
Using Plex TV for a Media Server
 I was tasked at the job to create a low budget media server. I looked around and found that
Installation & Configuration
Step 1: Download the Plex.tv installation from Plex.tv. I placed the installation file on the desktop.

Step 2: Double-click on the file.

Step 3: If you click on the “Option” button you will be able to change the default location of the installation files.

Step 4: If you changed the location and click “Ok” you will be prompted to install Plex.TV. Click on the “Install” button to start the installation.

Step 5: Click on “Yes” for the UAC (User Account Control).

Step 6: Be patience the installation doesn’t take to long.

Step 7: Once completed you will get the following dialog box. Click on “Launch”.

Step 8: Accept the terms of service from Plex.tv

Step 9: Give it some time for Plex.tv to setup and launch the wizard, so you can continue the configuraton.

Step 10: Provide a name for your Plex.tv media server

Step 11: Add a library to your media server. This library can be a folder with all your videos.

Step 12: Pick which type the library will be. I picked “Home Videos”.

Step 13: Click on “Next”

Step 14: Locate your folder by clicking on “Add Folder”

Step 15: Click on “Next” to confirm your new library.

Step 16: Install any of the available channel that Plex.tv broadcast for free.

Step 17: I picked “Apple Movie Trailers”. If you pick a channel it will asked you to “Install” it.

Step 18: Once your channel is installed. You can click on “Next”.

Step 19: And your done. Congrats!

Configuring Plex.TV for Outside Usage
The best part of having a media server especially at home is that you can access it anyway and anytime if you have wireless connection on a device. To make this happen, you will need to have a good strong router at home that does port forwarding, know your public IP address, and own a domain name.
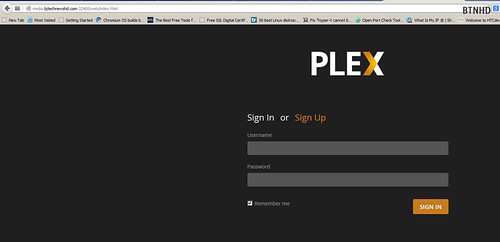
Step 1: Okay, by default your Plex.tv media server address is the IP address of the machine you have installed it into, which will be http://192.168.0.1:32400/web/index.html [remember: 192.168.1.0 should be YOUR machines IP address]

Step 2: Next, on your home router/wireless router enable port forwarding and add the Plex.tv machines’ IP address and change the ports to 32400, which is Plex.tv default port. By the way, you can change it if you want within your Plex.TV server.

Step 3: What’s your IP? Now, everyone has a public IP address. This one address is what gives you access to the internet world and your ISP manages it for you.

Step 4: Test your Public IP address with the Plex.TV address. Now, that you have your router configured to do port forwarding it should point to the media server with no problem. For example: http://456.23.12.789:32400/web.index.html [remember 456.23.12.789 is your public IP address]

Step 5: Okay, if you don’t want to remember all those numbers and you want to enter a domain name to enter your media server. You will need to purchase a domain and within your domain provider that you choose you are able to create an A Host record. The image below I created an A Host record called media that point to my public IP address.

Step 6: Once the A Host record is created you should be able to access your media server by entering the domain name without the IP address. For example: http://media.bjtechnewshd.com:324000/web/index.html
 Step 7: Congrats! You are now able to access your Plex.TV server from outside your home.
This has to be one of the worst written installation instructions I’ve ever read. From a technical standpoint, the ip addresses are completely wrong. 192.168.0.1 is NOT the ip of the computer, rather it’s the routers ip. Secondly, no ip addresses start with any number higher than 255.x.x.x. Thirdly, don’t ever use letters to indicate ip addresses as you did above. abc.def.ghi.jkl is nothing but confusing to non-technical users. Finally, you don’t have to buy a domain or pay for a hosting site. Look into dynamic dns hosting..cheaper and very little setup. The reason to do it this way you ask? Most ip addresses you are assigned by your internet service provider (ISP) are dynamic, which means they change either weekly or monthly. This means you will be reconfiguring your website all the time with the new address. If you are paying for a static ip ($5-10/month) you can do what you said, but it’s a waste.
I could go on, but clearly you need to consult with a network engineer before ever posting something like this again. One of the most confusing, inaccurate set of instructions I’ve read in quite some time!
TSG
Take the knife out of my side. You make good points, but I used 192.168.0.1 for any example of the machines’ IP address. I did state [remember: 192.168.1.0 should be YOUR machines IP address], but I should have been more clearer on that part because that IP address is the standard IP for most wireless routers. For the second IP address 456.23.12.789 I clearly made those numbers up. I understand that an IP address doesn’t go higher than a Class C subnet range, so I guess for an average person they will get confused. Finally, for me purchasing a domain to host a site, well that’s what I have setup for my sites and I do pay extra for a static IP address for my home server. Probably, the next time that I write up an article dealing with network stuff I will contact you a network engineer for your feedback. Again, thank you for your feedback.
Happy Thanksgiving!